
IT STARTED WITH SOURDOUGH.
Well, technically it started with targeted trips and cross-town treasure hunts to find toilet paper and Lysol wipes. But at some point early in the pandemic, it seemed like (almost overnight) countless friends and family members were suddenly talking about the wonders of making their own bread and arranging hands-free drop-offs of sourdough starters.
Doing-it-yourself – whether discovering new skills and rediscovering previous passions – has been one of the unexpected silver linings of living in the time of COVID-19. Whether you are self-isolating or maintaining small “cohort families,” the time definitely passes more pleasantly when there is chewy, freshly baked bread to nibble on, a pandemic puppy to play with or a bountiful backyard garden to visit before making a salad for dinner.
It turns out that Lethbridge College staff and alumni are experts at some essential stay-at-home skills that could come in handy this winter, especially if the community is called on to again limit social interactions. Starting with Heavy Equipment Technician instructor (and 2012 graduate) Mike Darlow’s advice for taking excellent photos in the winter, and continuing in the following six pages, you’ll get all the tips and tricks you need for making the most of time at home – even in the midst of a pandemic.
1. How To Teach A Pandemic Puppy A Few New Tricks
With Donna Mclaughlin
Among the trends that emerged out of the pandemic, you’d be hard-pressed to name one cuter and cuddlier than the pandemic puppy. How many of us adopted a new live-in bestie to comfort us in discomforting times?
 Hopefully, life with puppy is going well. But, in case not, we sought out advice from Donna McLaughlin, a learning experience design specialist
in Lethbridge College’s Centre for Teaching, Learning and Innovation. McLaughlin is a retired dog trainer, who learned from world-famous trainer Bob Bailey. Bailey was a colleague of B.F. Skinner, the father of behaviour conditioning. With Bailey, she learned to train chickens to navigate an obstacle course and distinguish colours and shapes. Most trainers can teach an eager-to-please dog, but training chickens requires precise application of training theory. Here are her tips:
- Begin training immediately. Sign up for a puppy class with an experienced trainer as soon as you can, and if there’s a waiting list, look up reward-based resources online and start training on your own because whether you intend it or not, your puppy is learning from day one.
- Focus on the behaviour you want more of, not the behaviours you don’t. It’s tempting to focus on the negative, like a dog that jumps up on people. Focus on sitting. The dog that sits isn’t jumping. Rewarding the behaviour you want is easier for you and the dog than focusing on the behaviour you don’t want.
- Crate train your dog so they have a den of their own, a safe space they like to be in. They can sleep there at night and stay there if and when you go back to working at an office. The crate is the safest way for your dog to travel in a vehicle, and a crate- trained dog will feel comfortable in a crate if they ever need to overnight with a vet. A crate reduces separation anxiety and makes travel to hotels and on airplanes easy.
- Don’t go overboard with equipment intended to keep your dog from pulling when on walks. There’s no replacement for training.
- Avoid areas where many dogs are socializing off leash. Your dog might be perfectly friendly, but not every dog there may be, and dogs can be injured when fun-loving dogs collide. It can also be difficult for dogs to control their excitement when on leash if they get used to free-for-all fun off leash.
- Plan to give your dog plenty of physical and mental stimulation. Even many small dogs need more exercise than you’d expect. Spend time walking your dog and provide puzzle games to keep your dog engaged and active.
2. How To Overcome A Fear Of Public Speaking
With James Castelli
James Castelli, an instructor in Lethbridge College’s Corporate and Continuing Education program, says that next to death, the greatest fear people have is public speaking. And he says there’s no better time than the present (even in a pandemic) to take a few steps to overcome that fear. While he always welcomes students in his Public Speaking and Presentation Course (including one that starts in early 2021), the practice can start at home – in front of a mirror. Once there, he says:
- Think of a passion you have to share, something you care deeply about – for example, mental health.
- Next, think of a way to start by capturing your audience’s attention. “If I asked by a show of hands who feels great,” Castelli sees himself saying in front of that mirror, “how many of you would stand up and yell ‘I’m great!’”
- Continue by talking about the “why” of your passion. He sees himself saying to the mirror: “I suffered for years from depression and low self-esteem. I felt like I just didn’t matter and couldn’t do anything right. Then I learned a secret.”
- End with passion and an inspiring message. He imagines saying: “I discovered I had the power to change my self-talk. I got help. I took control. I learned how to become enough and to believe in myself.”
Castelli says you can use this process for any self-empowerment and goal setting you have in mind. He adds that he uses his mirror every morning, taking time to read the messages he has written on it, and he encourages others to do the same. One message says: “I am enough.” Another says: “I am great,” which helps people stop comparing themselves to others and focus on their uniqueness. “We become what we think of everyday,” says Castelli. “Look at yourself in that mirror. You have just taken your first step towards becoming even more amazing than you are now.”

3. How To Help The Birds And The Bees
With The Virags And The Killians
Travis Killian (Electronics Engineer Technology 1994), manager of customer service and operations with the college’s Information Technology Service team, runs Killian Honey with his wife Kendell. Based in Magrath, the pair oversee what they call “millions of minions” who produce honey, wax for candles and other products sold locally.
Tom Virag (Business Administration 2010), Lethbridge College’s Residence and guest services coordinator, and his wife Marianne (Criminal Justice 2006) are in the birdhouse business. Prairie Bird Nest Boxes builds bird, bat and bee boxes based on scientific specifications suited to species found in southern Alberta.
We asked our experts how to make yards more attractive to these flying friends – something to think about this winter as we dream of spring yard work. You can learn more about Prairie Bird Nest Boxes and Killian Honey from their respective Facebook pages.
BE MORE BEE FRIENDLY
- Avoid pesticides. Bees are highly valued visitors because they pollinate fruit, veggies and are critical to the food chain. Pesticides don’t discriminate between helpful insects and pests.
- Plan your garden so something is in bloom from early spring through fall to provide a constant food supply.
- Provide water. If a bee visits your bird bath, pool or hot tub, let them. They’re just getting a drink and moving on.
FOR THE BIRDS
- To attract birds to your yard, provide the basics: water, food and shelter.
- Shelter can be a mature tree or other foliage, or a man-made box. If using a box, know that some are decorative, and others are practical. One telltale sign is a peg outside the “door.” This decorative perch gives invaders a place from which to launch a raid.
- Keep distance between the shelter and the food and water. Too close together, and you’ll be inviting nest raiders to visit. If they don’t feel safe, birds won’t stay in the shelter you’ve provided.

4. How To Be An Expert Griller This Winter
With Tristan Tuckett
For most home cooks, when the last leaves have fallen from the trees and the first snowflakes tumble from the sky, that means it’s time to pack away the barbecue for another year. But neither snow nor wind nor rain will keep Lethbridge College audio-visual technologist and barbecue enthusiast Tristan Tuckett (Communication Arts 2006) from serving up savory creations from his grill and smoker.
“I started with a barbecue that was maybe slightly larger than a camp stove and I would push the limits on that,” recalls Tuckett. “When my wife got me my first smoker four years ago, that’s when it really exploded for me.”
Now Tuckett keeps the fires burning year-round while chronicling his meals on his Instagram account @imeatingthisnow. If you’re not quite ready to give up the grill this winter, here are a few of Tuckett’s top tips for winter barbecuing. If you’re looking for more tips, gadget reviews or recipes, Tuckett suggests hitting up YouTube and social media where there are plenty of resources and thriving communities for grillheads.
- GIMME SHELTER: Set up your grill or smoker in a spot where you’ll be out of the elements (especially the wind) or, if you have the materials and know-how, build a wind break or shed (but remember to set up away from your house).
- START ME UP: Give your cooking platform extra time to heat up; it will take longer when the temperature outside is low.
- UNDER COVER: Don’t open the lid if you don’t have to. Frequent opening allows heat to escape, meaning your food will take longer to cook.
- PLAY WITH FIRE: Keep extra fuel around since you’ll burn more keeping your grill temperature up when it’s cold.
- SHINE A LIGHT: Be sure your cooking area is well-lit by outdoor lamps, or use a camping headlamp so you can see what’s cooking while keeping your hands free to flip.
- TIME IS ON MY SIDE: Keep your plate inside until it’s time to take food off the grill to make sure the food stays as warm as possible. Get a good digital Bluetooth or Wi-Fi thermometer to monitor the temp of your grill, and your meat while you stay warm and cozy inside.
WEB BONUS: Here’s how to make Tristan Tuckett’s Sour Cherry BBQ Sauce:
- ½ cup pitted sour cherries (or frozen cherries)
- ½ cup ketchup
- 3 tbsp. brown sugar
- 2 tbsp. Worcestershire sauce
- 1 tbsp. cider vinegar
- 2 garlic cloves, smashed
- ¼ tsp. mustard powder
- ¼ tsp. onion powder
- ¼ tsp. salt
- hot sauce to taste
- Combine all ingredients into a medium saucepan.
- Simmer over medium heat for 10 minutes, stirring and pressing down on the cherries occasionally.
- Strain the liquid through a fine mesh sieve and return to medium heat for 5 minutes.
- Let cool slightly and enjoy.

5. How To Skate Backwards
With Francis Rankin
Francis Rankin, Lethbridge College’s senior project manager and one of the city’s busiest hockey referees, spends a lot of time on his skates. He can glide around a pond in January with as much grace as he does on a freshly Zamboni-ed rink. He’s one of the best people to offer guidance on how to skate backwards – a step that most novice skaters, and some experienced skaters who never really learned, are usually eager to take. Here’s what Rankin says.
- Once you are comfortable moving forward, you are ready to start moving backwards.
- Start by keeping tight up against the boards with your back towards centre ice. Keep your skates roughly shoulder width apart, your knees slightly bent and your head up.
- Push off the boards and move backwards with the momentum you have created by the push. Enjoy this moment, Rankin adds, and keep going back to the boards and repeat your pushing until you feel more comfortable.
- Next, you’ll work on getting some momentum and speed – by using the inside edges of your skates. Bend your knees even more to reduce your centre of gravity and, again, keep your head up.
- Go back to the boards, and this time push out with both legs slightly wider than your shoulders. Move your legs by pushing in. Continue to repeat this motion, creating a lemon-shaped pattern on the ice (and momentum).
- Repeat this motion until you are comfortable and have gained confidence. You’ll likely be going faster now, and Rankin says skaters usually have a smile on their faces and are clearly enjoying themselves at this point.
- To go even faster, again you will want to return to the boards. But this time, use just one leg when you push out and make a c-cut with that leg. Then make a c-cut with the other leg and continue to alternate legs.
- Continue to use your inside edges, except this time push down much harder on your edge to create more momentum.
Rankin says he always enjoys seeing “parents watching their young children skate and go around the ice unassisted skating both forwards and backwards, and knowing someday that they will be able to watch them play hockey or ringette, or figure skate.”

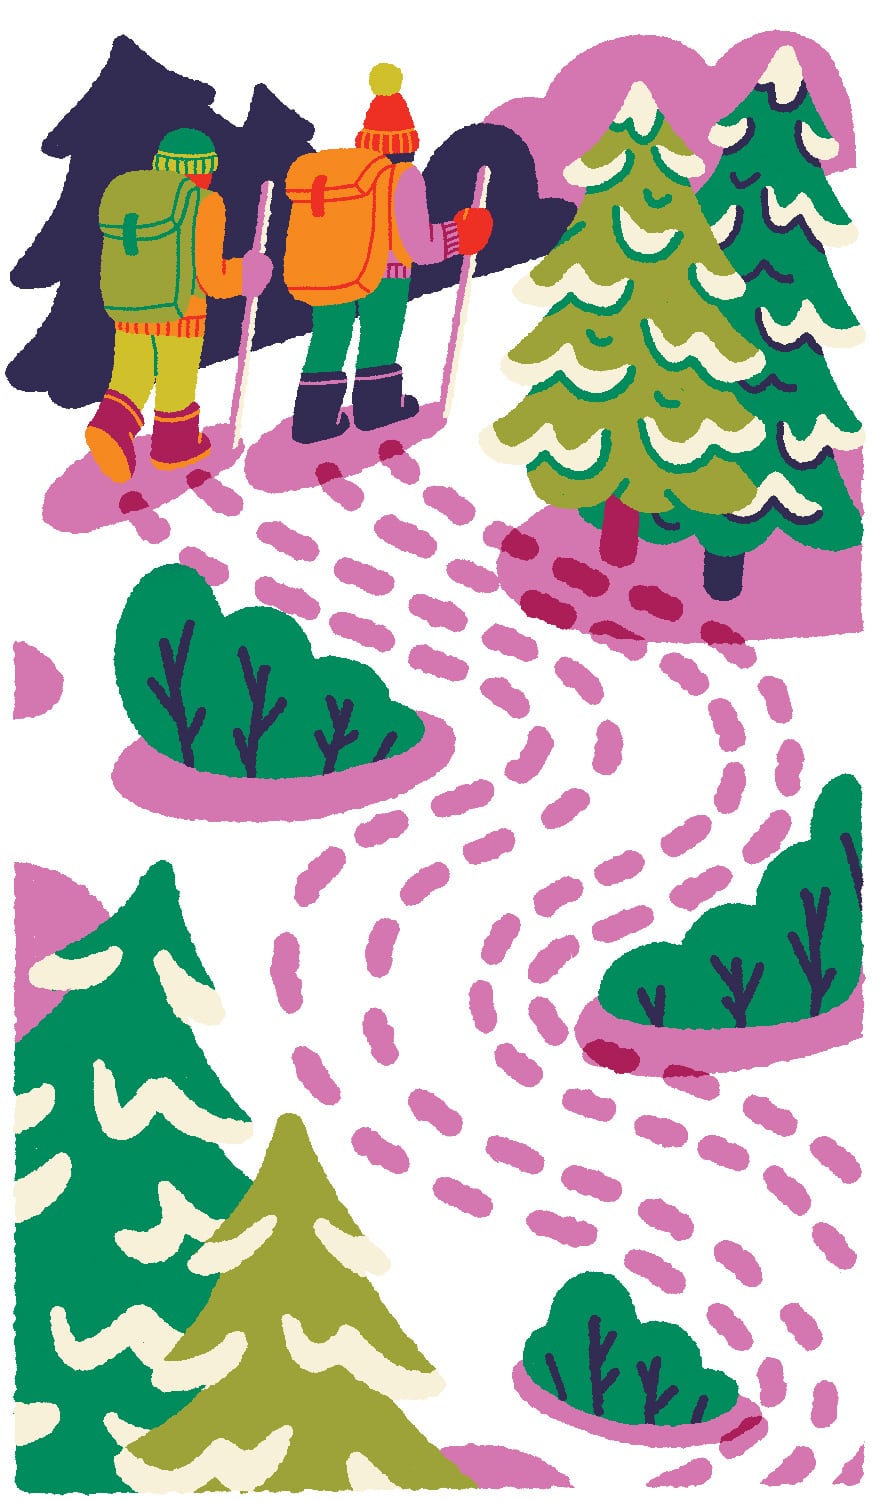
6. How To Plan A Perfect Winter Hike
With Brad Wolcott
Winter has a way of transforming the world around us. For lovers of the great outdoors like General Studies instructor Brad Wolcott, the colder months are a great time to gain a new appreciation for what the trails and slopes of southern Alberta have to offer. If you’re interested in getting outside more often this winter, Wolcott, an avid year-round hiker, has these tips to get you started.
- You don’t have to spend a lot of money on specialized gear, but a pair of microspikes (small spikes that you wear over your boots to give you extra traction on snow and ice) are must-haves. Without any traction, you will tend to slip, and the day can quickly become tiring and frustrating.
- You do not have to go very far to enjoy winter hiking. In fact, the mountains have their drawbacks: avalanche hazards, wildlife and more chances of getting lost. “I think the coulees [in Lethbridge] are overlooked as a hiking destination,” says Wolcott, who lists Pavan Park, Alexander Wilderness Park, Six-Mile Coulee (accessed from the college or Southridge) and Cottonwood Park as some of his favourite local trails.
- Make it a family affair. Bring the kids and, depending on COVID-19 restrictions on cohorts, invite their friends, as kids do much better if they have someone their own age along for the hike. They will complain less, and your day will be much more enjoyable. Try not to have strict goals, but simply let them explore. And, if all else fails, bribe them with candy or hot chocolate.
- Know your limits, be prepared by bringing extra food, water and warm clothes, and don’t be ashamed to turn back at any time. “Your primary goal should be to have fun,” says Wolcott.
- “People tend to get into trouble when they assume that their day will be incomplete unless they reach a specific destination, which can push people beyond their limits or place them in dangerous situations.”
7. How To Make Music In Your Life (Even As An Adult)
With Trudi Mason
Trudi Mason is Lethbridge College’s Associate Dean in the Centre for Justice and Human Services. She’s also a talented trumpet player who earned a master’s in Music from the University of Louisiana and has performed with orchestras and chamber ensembles across Canada and the U.S. She firmly believes in making music in your life – even after years (or decades) away.
“You may think that you have forgotten all of those skills you learned as a child, but trust me, you haven’t,” she says. “They are stored in the vault of your long-term memory. Give it a few weeks, and you will quickly remember that Every Good Boy Deserves Fudge (although I have used other acronyms… especially with my adult learners!).”
Mason has taught many adult learners over the years and says they have all looked forward to the joy and peace that music brings them. “There are many studies that show the connection between music and stress relief and in today’s world, and couldn’t we all use some stress relief?” she adds.
If you have toyed with the idea of picking up your childhood instrument or joining a choir, keep these tips in mind:
- Locate a reputable teacher. Ask people for recommendations, or check out the University of Lethbridge Conservatory of Music.
- Take your instrument in for a cleaning and tune up. There are several instrument repair shops in town. “Trust me,” Mason says, “you do not want to smell the inside of that trumpet that has been sitting in storage for 10 years plus.”
- Get your piano tuned!
- Join a local choir, even if you don’t think you can sing.
- Join a local community band or church band.
- Play in church or at a senior centre – they will love that you have spent the time to be there and share.
- Be patient with yourself. “Even after performing and teaching as a professional musician for 30 years plus, I still have to practice!” Mason says.
PRO TIP: Word of mouth is a great way to get started finding a good music teacher. Ask friends, neighbours and colleagues for their recommendations, or check out the options and opportunities awaiting at the University of Lethbridge Conservatory of Music.

8. How To Relieve Stress Through Art
With Soba Kaluthota
In 2010, Soba Kaluthota left her home in Colombo, Sri Lanka, for an unknown future in Canada. She and her husband, Chinthaka, came to Canada with their two daughters under the age of three, Sudhanya and Sithu. Looking for work, intending to pursue advanced degrees, and settling into a new culture, her love of art brought comfort to the chaos. Art has always been a part of Kaluthota, as it is in Sri Lankan culture. It was as constant as the Indian Ocean, which beckoned just a 15-minute drive from her home. The ocean lives on in her memories and her art. Using acrylic paint, a liquid medium, any solid surface and epoxy resin, Kaluthota creates seascapes on clocks, stools, wine glasses and more.
Since 2016, Kaluthota has been part of the Lethbridge College community – teaching statistics to first-year Environmental Science students and working as a research assistant in nutrient analysis in the Aquaculture Centre of Excellence. Art continues to be her pastime of choice. “Painting is my stress reliever,” she says. It can be yours, too. She suggests beginners not start with epoxy resin, which can be expensive. Instead, she says anyone can create beautiful abstract art by doing acrylic pouring. Some other tips to get started include:
- Start with small, dollar-store canvases and supplies. Simple craft paints can be mixed to create a rainbow of colours.
- Use plastic cups and wooden craft sticks for mixing colours, and something to cover your work area. Pouring means paint will be dripping from your canvas.
- Purchase a pouring medium, labelled as transparent and gloss. It thins paint to a pourable consistency and, because it’s transparent and gloss, the paint will retain its colour and dry to a shiny finish. Paint thinned with water is also possible but will dilute the colour. Start out with these basic inexpensive materials to get a feel for acrylic pouring.
- For those who are enjoying small projects, consider putting a layer of gesso on your canvas before pouring. It acts as a primer for your paint.
- A gel medium, also labelled transparent and gloss, can be added one-to-one with paint. It extends the volume of paint without diluting its colour.
- For an instructional video featuring Soba and her daughters, search “Art in 30 Go with the Flow” on YouTube.

9. How To Have Hope (Even In Hard Times)
With Becky Fitzgerald
Becky Fitzgerald is Lethbridge College’s resident expert on hope – but not in some wide-eyed optimistic way. Hope is something tangible that can be raised up or levelled flat through individual actions, and when it is present, it can positively affect outcomes. She has seen this as a nurse working with critically ill patients, and especially in her post-secondary students. “Advanced education is an act of hope all by itself,” she says.
Fitzgerald, Associate Dean in the Centre for Health and Wellness, is in the final stages of completing an Educational Doctorate in Distance Education, with research that asks Lethbridge College international students whose first language is not English how their hope is affected by online learning. Her work is based on Richard Synder’s hope theory, that hope has three specific components — goals, pathway thinking and agency thinking. Knowing them can be a first step to bolstering your own hope in the face of a long, isolating winter in the midst of a global pandemic. Here’s what she suggests to get started:
- Set a realistic and personally significant goal. Winning the lottery isn’t a goal – it’s a wish. Get real about what you want.
- Develop pathways toward that goal. Map out the steps between you and achieving your goal. Fitzgerald keeps a list of daily and weekly tasks so that the work needed to achieve her goal isn’t lost in the daily grind of working and living.
- The third element of hope is agency or being motivated. This is where the task list helps again. The act of checking off completed tasks is highly motivating.
- Don’t be deterred when you encounter a barrier. If you fail, assess why, and then reach out for advice and map out a plan to succeed next time.
- Keep a hopeful, positive mindset and use hopeful language. Write one positive thing that happened to you every day in a journal.
- Surround yourself with a community of people who help you move forward. Connect with “hope persuaders” who build you up, and be one to others.
As Fitzgerald says, “You need to find your people. Everybody needs help sometimes. It takes courage to advocate for yourself, but you need to because you’re worth it. Be a light. If you are a light to others, you will light yourself as well. Hope transfers.”

How To Bake Like A Pro (From Sugar Cookies To Sourdough)
With Amanda Kawchuk And Jim Page

It started with sourdough – but it doesn’t have to end there. Talented home cooks like Jim Page (read more about him in the Editor’s Message), and professionals like Lethbridge College grad and Chef Amanda Kawchuk (check out her recipe) can attest that there is always one more recipe worth trying. So to wrap up this special Wider Horizons feature, here are two favourites worth trying in your own kitchen: Kawchuk’s tips and tricks on how to make sugar cookies even more awesome, and Page’s finely tuned recipe for sourdough applesauce doughnuts, inspired by the 1972 version of The Complete Sourdough Cookbook by Don and Myrtle Holm. Enjoy!
CHEF AMANDA’S SUGAR COOKIES
Ingredients:
1 c. unsalted butter/shortening
1 1/3 c. sugar
¼ tsp. salt
1 egg
¼ c. milk
3 tsp. vanilla
2 ¼ c. cake flour
1 tbsp. baking powder
Method:
- Preheat over to 375F. In a large mixing bowl or bowl of stand mixer, cream together butter, sugar and salt. Combine eggs, milk and vanilla in a separate bowl. Sift together flour and baking powder in a separate bowl.
- Slowly add wet and dry ingredients to the butter/sugar mixture, alternating between them and stirring and scraping the sides of the bowl as you go. Turn dough out onto a work surface and flatten into a disc; wrap in plastic wrap and refrigerate until firm, at least 30 minutes or up to overnight.
- Remove dough from refrigerator and turn out onto lightly floured surface. Roll out dough with a rolling pin until it’s a sheet approximately 1/4” thick. Cut out cookies into desired shapes using a cookie cutter and transfer to a parchment lined baking sheet. Roll out any scrap dough and cut into shapes. Chill cookies until firm again, approximately 15 minutes.
- Bake cookies until they just start to colour, then transfer to a wire rack to cool. Decorate with royal icing or simple buttercream.
WEB BONUS - PRO TIPS:
- Finding the right temperature for your butter is key to a great cookie. Let your butter stand at room temperature until it’s softened. If you’re in a hurry, cut it into cubes or grate it with a cheese grater to speed up the process, but resist the temptation to pop it in the microwave.
- Chill your dough for at least 30 minutes before rolling it out. This makes it easier to work and your dough won’t stick to the worksurface when you roll it out.
- Don’t overbake the cookies; they should be lightly coloured, but not golden brown.
Check out more sugar cookie tips from Chef Amanda Kawchuk at www.widerhorizons.ca – and sign up for her baking course this winter at www.lethbridgecollege.ca/cce.

JIM PAGE’S SOURDOUGH APPLESAUCE DOUGHNUTS
Wet ingredients:
½ c. sourdough starter
½ c. sugar
2 tbsp. melted butter
¼ c. buttermilk (or 2 tbsp. plain yogurt)
2 egg yolks (or 1 whole egg)
½ tsp. vanilla
½ c. applesauce (or mash 1 small banana or 1/2 cup of canned apricots or peaches)
Dry ingredients:
3 c. sifted flour
½ tsp. nutmeg
½ tsp. cinnamon
1½ tbsp. baking powder
½ tsp. baking soda
1 tsp. salt
Method:
- Mix wet ingredients and dry ingredients in separate bowls. Combine wet and dry mixtures and stir thoroughly, adding flour as necessary, until dough forms a ball.
- Place dough on heavily floured bread board and knead until smooth. Pat or roll to thickness of 1/2 inch and cut into doughnut shapes. Let doughnuts stand for 15-20 minutes so the surface can set.
- Deep fry in preheated cooking oil (400 degrees) until golden brown. In 1+ quart of oil, I can fry three doughnuts at a time without the oil cooling down too much or becoming hot. If oil is too cool, doughnuts will absorb too much oil; if too hot, they will be raw inside and won't split open in their characteristic way.
- Drain doughnuts on paper towels until cool enough to roll in powdered sugar or cinnamon-sugar mixture. Makes 18-20 doughnuts.
WEB BONUS – Notes from Jim Page on making these doughnuts:
- These are the ultimate breakfast treat in the eyes of the grandkids. They always request them and love to help make them, too.
- Can make overnight. Wrap doughnuts on cookie sheets tightly with plastic wrap and refrigerate. Then, fry in the morning.
- Making a double batch takes 45 minutes to fry from beginning to heat the oil to finishing the last doughnut.
WEB BONUS – Jim Page’s instructions for making your own sourdough starter – inspired by The Complete Sourdough Cookbook
- Put 2 cups of flour into a crock, jar, or Tupperware bowl (never metal) that is at least warm room temperature. Add 2-1/2 cups lukewarm water, and set the whole batch in a warm but not hot place.
- In about four or five days, the pot will be bubbling slowly, like one of those Yellowstone Park wonders, and an aroma which you have never experienced on this earth will fill your kitchen with a heady fragrance from the wine of gods.
- To make one ready to use in just a few hours, use warm water that you've just boiled potatoes in, or sprinkle a package of active dry yeast over the flour before you mix in the plain warm water.
- Replenish after use with flour and water frequently. Use lukewarm water, never hot or cold.
- Starter may also be kept for several weeks under refrigeration and frozen for even longer. Just remember always to "bring it back" to room temperature so that it starts working again before using it in recipes.
- Pot should never be tightly closed.
- Never put back in the starter pot anything but flour or water. If starter turns orange, throw it away.
Note from Rebecca: There are so many sourdough guides out there with precise rules about tossing out starter every time you feed it and many have different measurements. In San Francisco, I find that roughly 1/3 cup of flour and 1/4 cup of water is the right amount for me when I feed my starter. It sits on the counter with a piece of beeswax coated cloth over the top and I'll feed it each day and use it as I want. Then when I won't need it for a few days or more, I put the lid on the jar and store it in the fridge.
WEB BONUS – Jim Page’s Sourdough Waffles
Wet ingredients:
2 c. starter
1 c. sweet milk or buttermilk
3 eggs (yolks in the wet ingredients, white separated and beaten)
¼ c. oil or melted butter
Dry ingredients:
2 c. flour
1 tsp. baking powder
1 tsp. baking soda
2 tbsp. sugar
1 tsp. salt
Method:
- Add stirred dry ingredients into stirred wet ingredients.
- Fold in beaten egg whites.
- Ladle onto lightly oiled waffle iron.
- Bake to golden brown.
Notes from Rebecca - I like to replace 1/4 cup of flour with cornmeal to make these a little more hearty. We also often will drop a few blueberries on top of each waffle.
WEB BONUS: Jim Page’s Sourdough Biscuits Today
Dry ingredients:
2½ c. sifted flour
4 tsp. baking powder
1½ tsp. baking soda
1 tsp. salt
2 tbsp. sugar
Wet ingredients:
¼ c. melted butter, plus more butter for pan
1 c. sourdough starter
1/2 c. buttermilk or lemon-soured milk
Method:
- Mix dry ingredients in a large bowl.
- Combine sourdough starter and buttermilk, and add to dry along with melted butter.
- Stir into dough ball and turn out onto lightly floured board.
- Knead until satiny, like bread dough.
- Pat or roll out to 1/2-in thickness, cut into 16 biscuits.
- Arrange biscuits in an 8-inch square pan containing lots of melted butter (like up to 1/4 cup) coating both sides. (You'll have to nestle them into the pan and it's helpful to dip the top of each biscuit into the melted butter so there's butter all around.)
- Let rise over boiling water for 45 minutes (I use an oven preheated to 200 degrees and turned off, but with the interior light on).
- Remove from oven and preheat oven to 425 degrees. Bake for 20-25 minutes, until golden and loose around edge of pan.