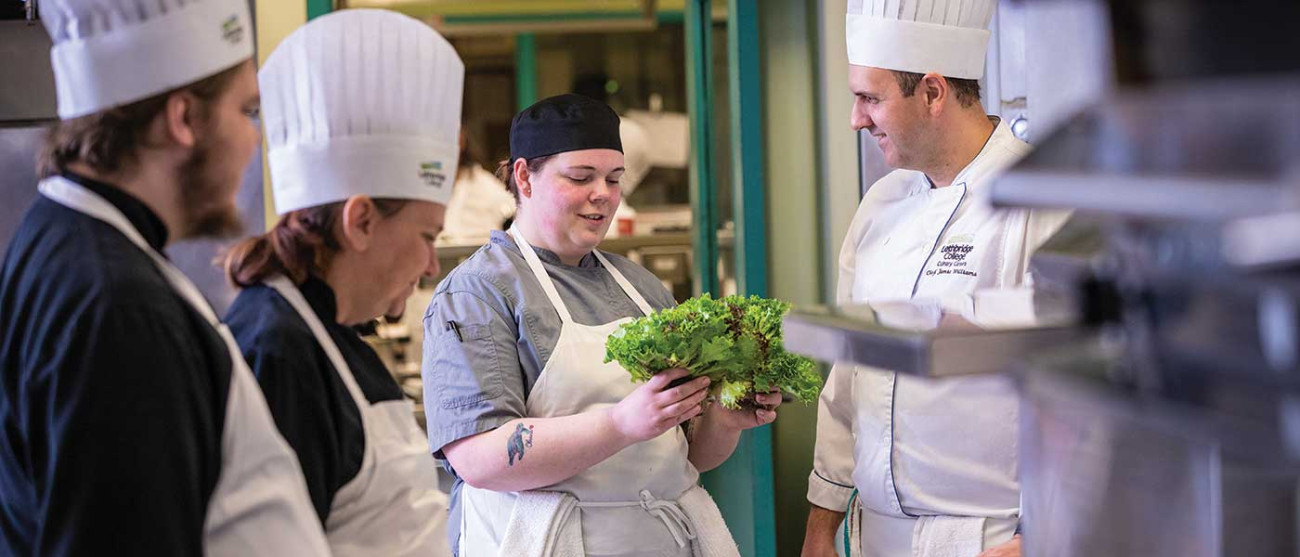
There is absolutely nothing wrong with raman. Packages of it – like that other favourite student staple of KD – fill student pantries, and often end up becoming a beloved comfort food long after graduation. But it doesn’t take much to elevate packaged foods to a new level – one of home-cooked deliciousness that probably is better for both heart and financial health. Wider Horizons asked six student chefs to take six favourite student meals and show how they could be made a bit more memorable in the kitchen of a regular home cook. We encourage you to check them out and, as the chefs would say, bon appétit!
1. Upgraded ramen
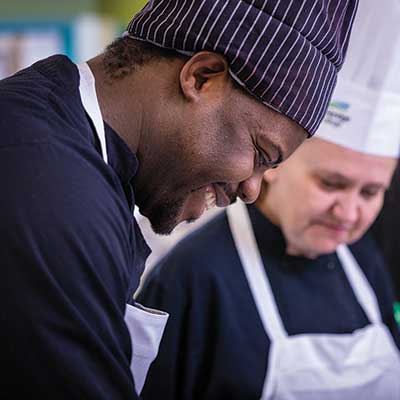
Chef Indigo Pulliam (Cook apprentice, third year)
 “I am Blackfoot and Cree Métis man from Calgary. When I think of ramen, my college brain thinks instant! It is fast, it is easy, and it usually tastes great but best of all it’s CHEAP! However, it is not a very balanced meal. So for my upgrade, I wanted to try to balance out the meal while keeping it simple and cheap. A soft-boiled egg is a great addition to ramen, and you need to eat your veggies, so I added some of those too! I also like to add some seared spam. I know it is a bit of an acquired taste, but I think it works great and is cheaper than pork belly! You don’t need to add the spam if it is not your thing, don’t worry, that’s the great part about this upgrade, and ramen in general. Things can be added and changed to whatever you like. The items listed are just what I like to add when I go all out making ramen.”
“One of my favorite memories that I have from my time in the program was the work placement program, where you are sent out to work as a cook at an actual restaurant. I was able to go to B.C. to work with the Canadian Rock Mountain Resorts Emerald Lake Lodge. It is an amazing way to get students on-the-job experience that is so crucial for preparing culinary students to enter the world of cooking!”
WHAT YOU WILL NEED:
- A pot large enough to boil at least two cups of water
- A cutting board and knife
- One pack Sapporo Ichiban original flavour.
- One to two large eggs
- One to two chopped green onions
- Two to three button mushrooms
- Spam (original flavour)
- One tablespoon chili flakes
METHOD
- Slice your desired number of green onions, mushrooms, and spam (I like three to four pieces), and set aside.
- Time to cook! For the best experience I recommend boiling your eggs before you start making the ramen. For the best soft-boiled egg, place your eggs in simmering water for exactly six minutes and remove them from the water as soon as possible. Once your eggs have cooled enough to handle, gently peel the shell away and set your eggs aside.
- Next, get a pan very hot and add your sliced spam. Sear on both sides so you get a nice dark brown colour.
- Remove the spam once browned and add your mushrooms immediately after to sauté for about 30 seconds. Remove from heat and set aside. They don’t need to be fully cooked, but you want them to start to release some of their water.
- Fill your pot with 1¾ cups of fresh water. Add the flavour packet and about one tablespoon of chilli flakes and return to the heat. Let the stock reduce for about three minutes and then add your noodles. Cook till al dente, still a little firm.
- Remove the pot with the noodles from the heat and place a small cloth underneath to prepare for assembly.
- Time to assemble! Start arranging your ingredients. You can toss the green onion, mushrooms, peeled eggs, and spam in haphazardly, or lay them out nicely on top of the noodles; it all depends on how soon you want to eat this delicious meal! I like to fan out my spam, so they are easy to grab one at a time.
- And you’re done! Takes no more than 20 minutes to do everything from start to finish. And you are left with a fun and fast meal! A nice plus is you only need to use two dishes! Enjoy!
2. Upgraded mac-and-cheese
Chef Taishi Hamilton (Culinary Arts diploma, second year)
“I was born and raised in Toyama, Japan, and now reside in southern Alberta. I have enjoyed every day of my program at Lethbridge College. My best memory (so far) was when we got to work with fresh oysters and mysteriously, they would keep appearing in my hand, garnished with lemon juice, mignonette and hot sauce. Although I do think my favourite memory will end up being the people and the lovely time, I got to spend with them, especially the six in my group.”
“This recipe is my go-to when my girlfriend says she wants mac and cheese. It is great for people who like to experiment with their cooking. There are many opportunities for you to add your own personal favourite flavour combos (as I do with blue cheese and dates, yum!) For the cheese, you’ll want to use block cheese, it will give that stringy, gooey feel you crave when it comes to mac and cheese. I usually choose two or three from the following cheeses (depending on what “kind” of mac and cheese I want, any combo will yield good results): sharp cheddar, gruyere, Gouda, mozzarella, parmesan, Emmenthal, etc. The pasta you choose is also up to you. My personal favourites are small shells or rotini, but for the sake of ‘mac and cheese’ for this recipe we are sticking with the classic elbow macaroni.”
INGREDIENTS
For the mac-and-cheese
- 250 g................................dried elbow macaroni (or any other tubular pasta)
- 3 tbsp...............................salted butter
- 3 tbsp...............................flour
- 2 tsp.................................dry mustard
- To taste............................cayenne pepper
- 1/3 c................................fine-diced onion
- 1......................................clove garlic
- 2 c....................................whole milk
- 2 c ...................................cream
- 3 c ...................................shredded cheese (half cheddar, half gruyere)
- 1 ......................................bay leaf
For the panko crumb
- As desired..........................Panko
- Small crumbles...................blue cheese
- Small diced.........................dried dates
- Finely grated.......................Parmesan
METHOD:
- Pre-heat the oven to 350F.
- Bring a large pot of water to a boil and add salt. Cook pasta just shy of al dente. Strain and set aside.
- Melt the butter in a large saucepan over medium heat. Add the dry mustard, cayenne, garlic, and onion. Add the flour and cook the roux until it is a light golden brown.
- Slowly whisk in the milk and cream into the roux.
- Reduce heat and whisk continually. Add the bay leaf.
- Cook and stir often until slightly thickened. It should coat the back of a spoon.
- While the sauce is forming, mix the parmesan, panko, blue cheese and dates in a bowl and set aside.
- Once desired sauce thickness is achieved, remove from heat, add the shredded cheese and stir till fully incorporated.
- Add the pasta into the sauce and stir.
- Place into a buttered baking dish, top with the panko crumb, and bake for 20 minutes. Enjoy!
3. Upgraded breakfast sandwich (Bacon and egg breakfast sandwich on a bagel with chipotle aioli, tomato, and avocado)
Chef Connor Lozza (Cook apprentice, second year)
“Cooking has always been a love of mine, but it didn’t become my passion until a few years ago when I left the industry for some time. I was quick to miss it and that’s when I realized it’s my passion and that’s what I want to do for the rest of my life. I have many fond memories of my time here – I can’t pick a favorite memory because every day at the college is special to me. This is my personal favorite recipe for a breakfast sandwich.”
INGREDIENTS
For the bagels
- 500g hard flour
- 5g active dry yeast
- 300g warm water
- 3g honey
- 10g salt
For the French style omelet
- 1 ....................................... whole egg
- 1 tbsp ................................ milk
- pinch ............................... flake salt
- pinch ..................................pepper, 1 Tbs
- 1 tbsp ................................ unsalted butter
For the maple glazed bacon
- 2 slices .............................. bacon
- 1 tbsp ............................... maple syrup
- 1 tsp ................................. brown sugar
For the chipotle aioli
- 2 ....................................... chipotle peppers
- 1 tsp ................................ salt
- 1 tbsp ............................... white wine vinegar
- 1 cup ................................ canola oil
- 1 tbsp ............................... Dijon mustard
- 2 ....................................... egg yolks
METHOD
For the bagels
- Combine flour and salt in a bowl. Add honey, yeast, and the water into separate bowl and let sit until yeast activates. Combine water and flour mixture and mix until fully combined, then knead dough till smooth.
- Place dough in bowl and cover for one hour until fermented. Punch down dough and cut into 100g portions.
- Ball the dough and let rest for 15 minutes.
- Form bagels and leave to rest for another 15 minutes. Preheat oven to 450F.
- Boil bagels for 30 seconds on each side in water and molasses, then remove and bake at 450F for 15 to 20 minutes.
For the French style omelet
- Whisk egg, milk, salt, and pepper together thoroughly until combined.
- Melt butter in pan on medium-low heat, then add egg mixture and stir till small curds start to form.
- Fold omelet while egg mixture is slightly runny.
For the maple glazed bacon
- Fry bacon in a pan until done, then remove from pan and degrease the bacon.
- Add brown sugar and syrup to pan and mix until sugar is dissolved and the glaze has thickened.
- Add bacon back to the pan and toss in the glaze.
For the chipotle aioli
- Roast peppers in hot pan and combine ingredients in a food processor except oil.
- Blend ingredients together and slowly add oil until emulsified.
- Assemble your breakfast sandwich. Add sliced tomato for texture and acidity, and avocado for texture and healthy fats.
4. Upgraded baked spaghetti
Chef Asariah Stephenson (Cook apprentice, third year)
“My culinary journey started at age 11 back in Jamaica. I began cooking with my father and he later realised that cooking came to me naturally, so he allowed me to cook for the family on Saturday when my mother was away at the market. …I migrated to Canada in 2012 and started attending Lethbridge College in 2020 to further my knowledge and love for cooking. Cooking is my passion – with just a few ingredients, I can transform the simplest of ingredients into something magical, leaving my clientele with a lasting dining experience.”
“I have a picky six-year-old son, and sometimes it is impossible to get him to eat. He likes anything that is sweet, salty and sour. So, whenever I cook, I try my best to come up with creative ideas to incorporate flavours he enjoys into everyday meals. I often prepared traditional spaghetti with meat, adding my own twist of flavours like smoky BBQ sauce, taco seasoning mix or bacon bits. Without fail, he enjoys a decent serving and ask for seconds. You can’t go wrong when it comes to making affordable, tasty and delicious meals for your family.”
“One of the most memorable moments of my apprenticeship program was when my first-year Instructor Chef Kenny Kain gave the class a pep talks about measurement and conversion where he mentioned if for some reason, we don’t understand a certain topic, we should let him know and he will figure out another way to make us understand. A big shout out to Chef Kenny. That was the first time I could envision myself completing the apprenticeship program.
“During my third year, Chef Jamie Williams gave the class a strategy to help us solve costing questions. He said “If you want more, get on top, if you want less, get to the bottom.’’ Chef Jamie’s technique worked and helped me tremendously. Whenever I am faced with a costing question, the first thing I do is to figure out what the question is asking – do I need more or do I need less. Shout out to Chef Jamie and Chef Stephen Klassen. In Jamaican terms, “Big up your self.”
INGREDIENTS
- 1 ...........................16-ounce package spaghetti
- 1 lb........................ground beef
- 1 ...........................onion, chopped
- 1 ...........................32-ounce jar tomato sauce
- ½ tsp .....................seasoned salt
- 2 ............................eggs
- ⅓ c .........................grated Parmesan cheese
- 5 tbsp.....................melted butter
- 5 c .........................shredded mix cheese, divided
- ½ c .........................smoky BBQ sauce
- ¼ c .........................taco seasoning mix
- ½ c .........................chopped bacon
METHOD
- Preheat the oven to 350F. Lightly grease a 9x13-inch baking dish.
- Bring a large pot of lightly salted water to a boil. Cook spaghetti in boiling water, stirring occasionally, until tender but firm to the bite, about 12 minutes. Drain.
- Meanwhile, heat a large skillet over medium heat. Cook and stir the beef, bacon and onion in the hot skillet until meat is browned and onion is soft and translucent, about 5 to 7 minutes. Drain excess oil from the pan; stir in tomato sauce, BBQ sauce, taco seasoning mix and seasoned salt, and allow to simmer.
- Whisk eggs, Parmesan and butter in a large bowl. Add spaghetti and toss to coat.
- Place 1/2 of the spaghetti mixture in the prepared baking dish. Top with 2 cups mix cheese, and 1/2 of the meat sauce. Repeat layers. Cover with aluminum foil.
Bake in the preheated oven for 40 minutes. Remove the foil and sprinkle with remaining 1 cup mix cheese. Continue to bake until cheese is melted and lightly browned, 20 to 25 minutes. Served with your favourite toast. Enjoy!
5.Upgraded Chicken Pot Pie
Chef Stephanie Kunkel (Cook apprentice, third year)
“One of my best memories is when Chef Rob Sonnenberg and Chef Allen Clampitt took me and the students to a fish farm in Granum. We got to learn what fish they had there and how they cleaned the areas – and we also got some fish to bring back to the college to learn how to fillet them.”
INGREDIENTS (to serve six)
For the pot pie
- 2 tbsp butter
- 1 white onion
- 2 tbsp minced garlic cloves
- 3 celery stalks
- 2 medium carrots
- 3 medium potatoes
- ¾ cup frozen corn
- ¾ cup frozen peas
- ¾ cup green beans (fresh or frozen)
- 4 large chicken breasts
For the gravy
- 2 cups..................chicken stock
- 1 cup ...................milk
- 1 tsp ....................onion powder
- 1 tsp.....................garlic powder
- 1 ½ tsp.................poultry seasoning
- 2 tbsp...................Better than Bouillon roasted chicken base
- 1 cup ...................sour cream
- Salt and pepper to taste
- Cornstarch and cold water
For the biscuit topping
- 2 cups..................flour
- 1 tbsp..................baking powder
- ½ tsp ...................salt
- 5 tbsp .................cold unsalted butter
- ¾ cup ..................milk
- ¾ cup...................shredded cheese
METHOD
For the pot pie
- Pre heat oven to 350F. Cook chicken in oven – about 20-25 minutes.
- Small dice onion, celery, carrots, and potatoes. Mince garlic cloves.
- Put potatoes in a pot of water and set to boil. Par cook them for about 10 minutes.
- Put carrots in a pot of water and set to boil. Par cook them for about four to five minutes.
- Add butter to sauté pan and melt. Add onion, celery, and garlic. Sauté until translucent.
- Dice the cooked chicken. Mix everything together.
For the gravy
- Deglaze the sauté pan with a little chicken stock. Transfer to a pot. Mix chicken stock, milk, and seasonings. Heat.
- Stir in bouillon until dissolved. Slowly add sour cream into the mixture. Adjust seasonings with salt and pepper.
- Mix cornstarch and water together to create a slurry. Pour in slurry mixture and bring to a boil. May have to thicken more.
- Mix in with the previous vegetable and chicken mixture. Put into a greased 9 x 13 pan.
For the biscuit topping
- Mix flour, baking powder and salt together. Add cubed cold butter in. Blend together until butter is the size of small peas.
- Slowly mix the milk in until the dough comes together. Mix the shredded cheese into the dough. Roll the biscuit out until it fits your pan.
- Brush milk onto the biscuit crust. Bake at 350F for 20 to 30 minutes, until the crust starts to brown. Enjoy!
6. Upgraded tacos (beef cheek tacos, pineapple pico de gallo and avocado crema)
Chef Blake Forster (Cook apprentice, third year)
“I am from Forestburg, Alta., and am currently working at Bourbon and Butter in Lethbridge. My favourite memory cooking at Lethbridge College would have to be last year when I was in my second-year training for the Skills Alberta competition. I put in long hours over several months and with dedication, hard work, and the help from my chefs at the college, I earned a silver medal.”
INGREDIENTS (to serve four)
For the beef cheek
- 2 lbs......................Beef Cheek
- 4 ...........................green tomatillos, halved
- 2 ...........................guajillo peppers, halved
- 1 ...........................ancho pepper, halved
- 1 ...........................white onion, quartered
- 4 ...........................garlic cloves
- 2 ...........................bay leaves
- 1 tbsp ...................Mexican oregano
- 1 tbsp....................ground cumin
For the grilled pineapple pico de gallo
- ¼ ..........................pineapple, grilled and small diced
- 1............................serrano pepper (seeded), small diced
- ¼ ..........................red onion, small diced
- 1............................Roma tomato (cored and seeds removed), small diced
- 1............................lime, zested and squeezed
- ¼ c. .......................cilantro, finely chopped
For the avocado crema
- 3 ..........................avocados
- ¼ c....................... mayonnaise
- ¼ c ...................... sour cream
- 2 ......................... limes, zested and juiced
- ¼ c ...................... cilantro
- 1 tbsp ................. chili powder
- 1 tsp ................... ground cumin
METHOD
For the beef cheek
- Preheat oven to broil. Heat and oil a cast iron pot to medium high, season the beef cheeks with salt and pepper, and sear one at a time, making sure to get a deep brown colour on all sides. Remove and set aside.
- At the same time, place all the vegetables cut side down on a baking tray and place tray into the oven turning every so often making sure to get a deep char on all sides of the vegetables.
- Once charred add all the vegetables, seasonings and 3 cups of water to a blender and blend until almost a broth like consistency is achieved, adding more water if necessary.
- Add this vegetable liquid, beef cheeks, and bay leaves back into the cast iron pot and simmer for three hours.
- Once done remove the cheeks and discard the bay leaves.
- Shred the beef along with a ½ cup of the braising liquid and set aside for serving. Keep the braising liquid to dip your tacos in later!
For the grilled pineapple pico de gallo
- Turn on grill to med high. Cut off ¼ of the pineapple, remove the skin, slice into disks, remove the core and place on hot grill until charred, about five minutes each side.
- Remove and small dice. Combine remaining ingredients in a bowl and season with salt and pepper to taste. Set aside
For the avocado crema
- Cut avocados in half circling the pit, remove the pit and peel away the skin and discard both.
- Combine all ingredients to a blender and blend till smooth, season with salt and pepper to taste.
To serve, fill warm tortillas with the beef cheek. Top with grilled pineapple pico de gallo, and drizzle avocado crema over top of each. Garnish with thinly sliced radish and finely crumbled Cotija cheese. Enjoy!